


Hitches and Towing 101
| CHAPTER CONTENTS | |
| 1. Introduction to Towing | 7. Brake Controls |
| 2. Towing Components | 8. Hitch Installation |
| 3. Types of Hitches | 9. Hooking Up |
| 4. Determining Tow Capacity | 10. Tow Bars/Dinghy Towing |
| 5. Selecting Your Hitch | 11. Towing Safety |
| 6. Wiring/Electrical | 12. Preparing Your Tow Vehicle |
Chapter 8 - Hitch
Installation
If your tow vehicle did not come
equipped with a trailer hitch from the factory, you'll need to install one, or
have it installed for you by a professional hitch installer. The
majority of receiver hitches today are "no-drill" applications. That
means that the trailer hitch and hardware were designed to fit into existing
bolt holes in the frame of the vehicle. This usually makes the job pretty simple
and most do-it-yourselfers can successfully install a hitch very easily.
Sometimes you may be required to temporarily move exhaust components out of the
way but even then, the job shouldn't be too difficult. Some applications require
fascia trimming so you will want to be very careful and TAKE YOUR
TIME.
There are some applications that may require an extensive, mechanical background to install. In this event, unless you possess excellent mechanical abilities, you may wish to consider having a professional installer do the job for you. If you bring your own hitch to a professional installer you can expect to pay hourly shop rates to have the pro do the work. You may be able to get a better total deal by purchasing the hitch and the installation from the professional hitch installer.
 Go
online & look at the installation instruction sheet for the hitch
you are selecting & then decide if this is something you should
tackle or leave to the
experts. Go
online & look at the installation instruction sheet for the hitch
you are selecting & then decide if this is something you should
tackle or leave to the
experts. |
Get the Right Tools for the Job
To install your hitch so it stays installed, you need to have the right tools
- don't tackle this with a pair of pliers and a crescent wrench! At a minimum,
you'll want these tools:
- A set of good combination box/open end wrenches in both SAE (standard) and Metric sizes up to at least ¾-inch and 19mm.
- A good wiring kit, including a proper stripping and crimping tool and good electrical connectors, plus a roll of electrician's tape. Heat-shrink tubing is even better. If you have a custom T-Connector application, you should not need any of these accessories. T-Connectors are basically plug in and go.
If you have these tools, your job will be even easier:
- A good rachet wrench and set of ½-inch drive sockets in both SAE and Metric up to ¾-inch and 19mm,
- An air impact wrench and appropriate heavy-duty sockets - but be careful ot to over tighten.
- A torque wrench and appropriate sockets.
Additionally, you may need a jack and jackstands to raise your vehicle safely to perform the installation. Always use safe work practices and never get under a jacked-up car without using quality jack stands to support the vehicle.
You may also need snips or other tools if your vehicle requires any cutting of bumper fascias or other materials to install the hitch. This is where the installation instructions come in handy. See Figure 8-1 for an example of installation instructions for a particular hitch on a Chevy ¾-ton pickup. For this installation, you need a ¾-inch wrench to tighten the main frame bolts, plus a 21mm wrench for the two bolts that attach the hitch to the welded nuts in the bumper. You also need a means to cut the bumper trim for access to the welded nuts. Read through your instructions carefully and assemble the required tools before you begin installation.
Installing Your Hitch Receiver
As previously
mentioned, many pickup trucks, SUVs and RVs come with some holes pre-drilled at
the back of the frame to accommodate a hitch receiver, and in these cases it's
very likely that the hitch you buy will have matching holes, if the hitch was
designed to fit your particular make and model of vehicle.
Figure
8-1: Class 3 RV Hitch
However, even if your vehicle's frame
is not pre drilled, you can drill the necessary holes with an ordinary
heavy-duty ½-inch chuck handheld drill and bolt your receiver into place. Most
receivers will come with the necessary nuts, bolts and washers to complete the
job. Make sure you follow the manufacturer's directions exactly and tighten all
fasteners securely.
| Thread
locking treatments such as Loc-Tite are a great idea. Even if your
hardware kit includes lock washers or locking nuts, it never hurts to have
a little extra
security. |
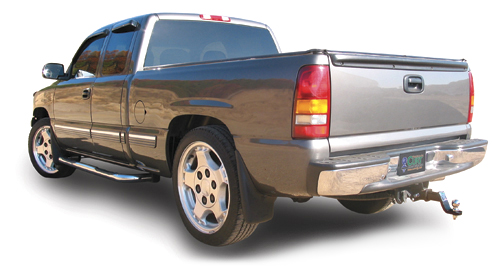
Figure
8-1: A well-installed hitch
A typical hitch installation goes like this:
- Get your car or truck as high as safely possible to give yourself room to work. Use jack stands to make sure it doesn't fall on you.
- Get under the vehicle with good light at the installation instruction sheet and locate all the bolt holes and other connections you need to make. If you need to lower or remove the spare tire to perform the installation, do that now. Also, perform any trimming or cutting at this point.
- If the installation involves dropping a carriage bolt through a hole in the frame, pointing downwards (and this is usually the case), do that now, so you can offer up the hitch to the frame as easily as possible. In many cases, two of the bolts drop through the frame, and two are installed up through the hitch with the nuts on top of the frame.
- Bring the hitch under the vehicle and place it in position. Some hitches weigh a lot - up to 50 pounds or more, so you might want to use a jack or other support. If you have a helper, get them to place the washers and/or spacers and start the nuts on at least one bolt per side. Generally speaking you'll be using lock-nuts of some kind, so once the nut is started, you'll need a wrench to turn it.
- Tighten all nuts and bolts to the specified torque.
And that's all there is to it! Of course, there's still the wiring to do, and that's covered in Chapter 6.
| If
the bolts are just hanging in the frame, use some duct tape over the bolt
heads to keep them in place while you get the bolt ends through the
holes in the hitch. |
Installing the Ball Mount
See Chapter 5 for
information on selecting the correct ball mount. You want to
make sure that your trailer and tow vehicle each sit level when they are
connected, and the rise or drop in your ball mount should account for any ride
height differences. You also want to make sure that the ball mount is long
enough to extend the tow ball safely out from your vehicle, but not so far that
leverage multiplies the trailer's tongue weight on the receiver.
| Consider using an anti-rattle device
to help stop annoying rattles & even help prevent swaying of the
load. |

Figure 8-1: Rise, Drop, and length in an installed ball mount
Installing the towing ball on the ball mount is just
like installing the hitch receiver to your tow vehicle. You want to use the
hardware provided with the ball, which may include a sleeve (or reducer
bushing) to occupy any
extra space between the ball shaft and the hole
in the ball mount.
| Never install a tow ball with excess
space between the ball shaft & the ball mount hole. No matter how
much you tighten the nut, the ball will still move & it will tend
to come
loose. |
As with your hitch receiver, use some thread locking treatment when you install a ball into the ball mount.

Figure 8-2: Ball mount with significant drop

Figure 8-3: Turn your ball mount over if you need rise
If you tow several trailers, you may find it convenient to purchase a separate ball mount for each one, or an adjustable ball mount. In addition to differing ball sizes between light and heavy trailers, each trailer has its own ride height and will need a different rise or drop in the ball mount. You might also use a "universal hitch ball" that allows you to switch sizes of balls without having to remove the shank.
| << Back to Chapter 7 | Go to Chapter 9 >> |